In this article, we will build the chat application with Spring Boot and WebSocket where anyone can communicate or chat with others. Just you need to type your name to login and start chatting with others.
Generally, the web application has developed in the model of request and response parameter, so whenever any request comes to the server then it returns the data as a response parameter, but if you noticed, the server never sends the data to the client on its own.
The server always waits for the client or browser request and accordingly sends the data in the form of JSON. In short, there is only one way of communication between the server and the client. The server always needs to be dependent on the client in order to send the data.
But with the help of the WebSocket Protocol, we can achieve the two-way communication between the server and the client, which means the server no need to wait for the client’s request to send the data.
Up to now, we learned for what purpose WebSocket used, Now let’s jump in the practical implementation and build the amazing chat application.
Final Application
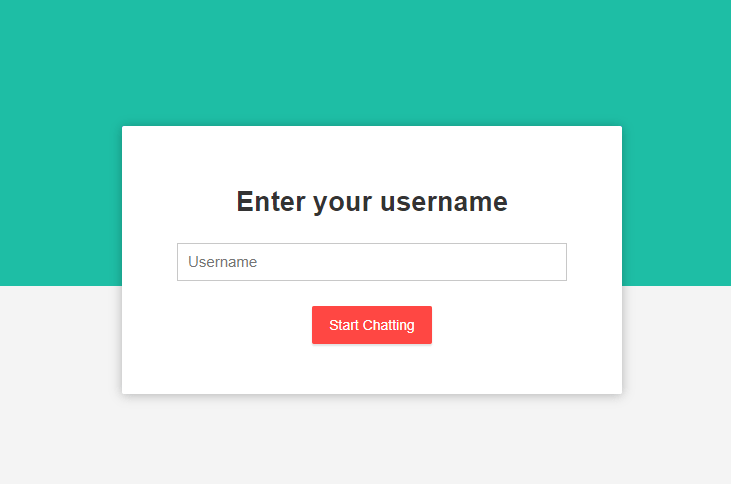
Note: Source code is available in the bottom section.
Video Tutorial available in bottom section of this article.
Follow each and every steps stricly as mentioned below.
Step 1: Create a Project from Spring Initializr.
- Go to the Spring Initializr.
- Enter a Group name, com.pixeltrice.
- Mention the Artifact Id, spring-boot-WebSocket-chat-app
- Add the following dependencies,
- Spring Web.
- WebSocket.
Step 2: Click on the Generate button, the project will be downloaded on your local system.
Step 3: Unzip and extract the project.
Step 4: Import the project in your IDE such as Eclipse.
Select File -> Import -> Existing Maven Projects -> Browse -> Select the folder spring-boot-WebSocket-chat-app-> Finish.
Step 5: Create a WebSocket Configuration class.
WebSocketConfig.java
package com.pixeltrice.springbootWebSocketchatapp;

import org.springframework.context.annotation.Configuration;
import org.springframework.messaging.simp.config.MessageBrokerRegistry;
import org.springframework.web.socket.config.annotation.EnableWebSocketMessageBroker;
import org.springframework.web.socket.config.annotation.StompEndpointRegistry;
import org.springframework.web.socket.config.annotation.WebSocketMessageBrokerConfigurer;

@Configuration
@EnableWebSocketMessageBroker
public class WebSocketConfig implements WebSocketMessageBrokerConfigurer {

    @Override
    public void registerStompEndpoints(StompEndpointRegistry registry) {
        registry.addEndpoint("/ws").withSockJS();
    }

    @Override
    public void configureMessageBroker(MessageBrokerRegistry registry) {
        registry.setApplicationDestinationPrefixes("/app");
        registry.enableSimpleBroker("/topic");
    }
}
Explanation of Code.
@EnableWebSocketMessageBroker: This annotation is used to enable the WebSocket Server. We also implement the WebSocketMessageBrokerConfigurer interface in order to provide definitions or logic to some of its methods to establish a WebSocket connection.
registerStompEndpoints() Method Explanation
 @Override
    public void registerStompEndpoints(StompEndpointRegistry registry) {
        registry.addEndpoint("/ws").withSockJS();
    }
In this method, we define a WebSocket endpoint so that client will use it to establish a connection with our WebSocket server.
If you noticed, there is the word Stomp in the method name, Actually, these all methods come from the STOMP implementation in Spring frameworks. The full form of STOMP is the Simple Text Oriented Messaging Protocol.
In simple words, STOMP is a messaging protocol that defines the rules and format for data exchanging between server and client.
So, the question is Why we need STOMP for developing the chat application?? As we already using the WebSocket for exchanging the messages. You know the problem with WebSocket is that it fails to identify particular users.
For example, there are no functionalities in Websocket to send the message only to the users who subscribed to the channel or topic or How to send the message to selective users.
configureMessageBroker() method Explanation
 @Override
    public void configureMessageBroker(MessageBrokerRegistry registry) {
        registry.setApplicationDestinationPrefixes("/app");
        registry.enableSimpleBroker("/topic");
    }
This method is used to route the message from one client to another client, who is in the group chat. In more simple terms, when one user sends the message in the group chat, it appears in front of all the group members.
This functionality we can achieve with the method configureMessageBroker(MessageBrokerRegistry registry).
Inside the above method, the very first line is used to define the messages whose destination starts with “/app” and it should be routed to the message handling method. Still, we have not defined the message handling method, we will define shortly.
The purpose of the second line is to defines that messages whose destination starts with “/topics” and it should be routed to the message broker. And Message Broker will broadcast the messages to all the connected users or clients who subscribed to that topic.
Note: In our application, we are using an in-memory message broker, but there are lots of message broker out there in the market such as RabbitMQ or ActiveMQ, you can use any one of them as per your requirements and need.
Step 6: Create ChatMessagePojo class.
This class will be used as a Model where all necessary variables or data are declared, and this class will act as a payload that can be exchanged between client and server.
ChatMessagePojo.java
package com.pixeltrice.springbootWebSocketchatapp;

public class ChatMessagePojo {

	 private MessageType type;
	    private String content;
	    private String sender;

	    public enum MessageType {
	        CHAT,
	        JOIN,
	        LEAVE
	    }

	    public MessageType getType() {
	        return type;
	    }

	    public void setType(MessageType type) {
	        this.type = type;
	    }

	    public String getContent() {
	        return content;
	    }

	    public void setContent(String content) {
	        this.content = content;
	    }

	    public String getSender() {
	        return sender;
	    }

	    public void setSender(String sender) {
	        this.sender = sender;
	    }
	}
If you notice there is public enum MessageType(){} in above code. In java, enum is a special class that is used to represents the group of constant variables. So, MessageType is an enum class.
Step 7: Create a Controller class to send and recieve the messages.
As, I mentioned in Step 5, that we will shortly define the message handling method, so in this step we are going to create this method.
ChatController.java
package com.pixeltrice.springbootWebSocketchatapp;

import org.springframework.messaging.handler.annotation.MessageMapping;
import org.springframework.messaging.handler.annotation.Payload;
import org.springframework.messaging.handler.annotation.SendTo;
import org.springframework.messaging.simp.SimpMessageHeaderAccessor;
import org.springframework.stereotype.Controller;

@Controller
public class ChatController {

    @MessageMapping("/chat.sendMessage")
    @SendTo("/topic/public")
    public ChatMessagePojo sendMessage(@Payload ChatMessagePojo chatMessagePojo) {
        return chatMessagePojo;
    }

    @MessageMapping("/chat.addUser")
    @SendTo("/topic/public")
    public ChatMessagePojo addUser(@Payload ChatMessagePojo chatMessagePojo, SimpMessageHeaderAccessor headerAccessor) {

// Add username in web socket session
    headerAccessor.getSessionAttributes().put("username", chatMessagePojo.getSender());
        return chatMessagePojo;
    }
}
If you remembered in the WebSocket Configuration class, all the messages sent from clients whose destination starts with /app will route or mapped with these message handling methods which tagged with @MessageMapping annotation.
For example, if the client calls the API or endpoints such as /app/chat.sendMessage then it will be mapped with method sendMessage() of the controller class. Similarly, for /app/chat.addUser, it will be mapped with the method addUser().
Step 8: Create a class for WebSocket Event listeners.
In this step we define event listeners for the connection or disconnection of client or user with our WebSocket server so that we can log these events and also broadcast them in a group chat when the user joins or leave the group.
WebSocketEventListener.java
package com.pixeltrice.springbootWebSocketchatapp;

import org.slf4j.LoggerFactory;
import org.springframework.beans.factory.annotation.Autowired;
import org.springframework.context.event.EventListener;
import org.springframework.messaging.simp.SimpMessageSendingOperations;
import org.springframework.messaging.simp.stomp.StompHeaderAccessor;
import org.springframework.stereotype.Component;
import org.springframework.web.socket.messaging.SessionConnectedEvent;
import org.springframework.web.socket.messaging.SessionDisconnectEvent;
import org.slf4j.Logger;

@Component
public class WebSocketEventListener {

    private static final Logger logger = LoggerFactory.getLogger(WebSocketEventListener.class);

    @Autowired
    private SimpMessageSendingOperations messagingTemplate;

    @EventListener
    public void handleWebSocketConnectListener(SessionConnectedEvent event) {
        logger.info("Received a new web socket connection");
    }

    @EventListener
    public void handleWebSocketDisconnectListener(SessionDisconnectEvent event) {
        StompHeaderAccessor headerAccessor = StompHeaderAccessor.wrap(event.getMessage());

        String username = (String) headerAccessor.getSessionAttributes().get("username");
        if(username != null) {
            logger.info("User Disconnected : " + username);

            ChatMessagePojo chatMessagePojo = new ChatMessagePojo();
            chatMessagePojo.setType(ChatMessagePojo.MessageType.LEAVE);
            chatMessagePojo.setSender(username);

            messagingTemplate.convertAndSend("/topic/public", chatMessagePojo);
        }
    }
}
In the above class, we only define an event listener to fetch the username from the WebSocket session and broadcast the username of the person who left the chat among all the connected users.
Since we are already written a method addUser() in the controller class which will broadcast the user join the event in the group chat among all connected users.
Step 9: Create a Frond End for our application.
1. Create a index.html in the path src/main/resources/static.
index.html
<!DOCTYPE html>
<html>
  <head>
      <meta name="viewport" content="width=device-width, initial-scale=1.0, minimum-scale=1.0">
      <title>Welcome to Spring Boot Chat Application</title>
      <link rel="stylesheet" href="/css/main.css" />
  </head>
  <body>
    <noscript>
      <h2>Sorry! Your browser doesn't support Javascript</h2>
    </noscript>

    <div id="username-page">
        <div class="username-page-container">
            <h1 class="title">Enter your username</h1>
            <form id="usernameForm" name="usernameForm">
                <div class="form-group">
                    <input type="text" id="name" placeholder="Username" autocomplete="off" class="form-control" />
                </div>
                <div class="form-group">
                    <button type="submit" class="accent username-submit">Start Chatting</button>
                </div>
            </form>
        </div>
    </div>

    <div id="chat-page" class="hidden">
        <div class="chat-container">
            <div class="chat-header">
                <h2>Welcome to Spring Boot Chat Application</h2>
            </div>
            <div class="connecting">
                Connecting...
            </div>
            <ul id="messageArea">

            </ul>
            <form id="messageForm" name="messageForm">
                <div class="form-group">
                    <div class="input-group clearfix">
                        <input type="text" id="message" placeholder="Type a message..." autocomplete="off" class="form-control"/>
                        <button type="submit" class="primary">Send</button>
                    </div>
                </div>
            </form>
        </div>
    </div>

    <script src="https://cdnjs.cloudflare.com/ajax/libs/sockjs-client/1.1.4/sockjs.min.js"></script>
    <script src="https://cdnjs.cloudflare.com/ajax/libs/stomp.js/2.3.3/stomp.min.js"></script>
    <script src="/js/main.js"></script>
  </body>
</html>
2. Add the main.js in the path src/main/resources/static/js
In this step, we will add the javascript code required for connecting the WebSocket endpoints for sending and receiving the messages.
main.js
'use strict';

var usernamePage = document.querySelector('#username-page');
var chatPage = document.querySelector('#chat-page');
var usernameForm = document.querySelector('#usernameForm');
var messageForm = document.querySelector('#messageForm');
var messageInput = document.querySelector('#message');
var messageArea = document.querySelector('#messageArea');
var connectingElement = document.querySelector('.connecting');

var stompClient = null;
var username = null;

var colors = [
    '#2196F3', '#32c787', '#00BCD4', '#ff5652',
    '#ffc107', '#ff85af', '#FF9800', '#39bbb0'
];

function connect(event) {
    username = document.querySelector('#name').value.trim();

    if(username) {
        usernamePage.classList.add('hidden');
        chatPage.classList.remove('hidden');

        var socket = new SockJS('/ws');
        stompClient = Stomp.over(socket);

        stompClient.connect({}, onConnected, onError);
    }
    event.preventDefault();
}


function onConnected() {
    // Subscribe to the Public Topic
    stompClient.subscribe('/topic/public', onMessageReceived);

    // Tell your username to the server
    stompClient.send("/app/chat.addUser",
        {},
        JSON.stringify({sender: username, type: 'JOIN'})
    )

    connectingElement.classList.add('hidden');
}


function onError(error) {
    connectingElement.textContent = 'Could not connect to WebSocket server. Please refresh this page to try again!';
    connectingElement.style.color = 'red';
}


function sendMessage(event) {
    var messageContent = messageInput.value.trim();
    if(messageContent && stompClient) {
        var chatMessage = {
            sender: username,
            content: messageInput.value,
            type: 'CHAT'
        };
        stompClient.send("/app/chat.sendMessage", {}, JSON.stringify(chatMessage));
        messageInput.value = '';
    }
    event.preventDefault();
}


function onMessageReceived(payload) {
    var message = JSON.parse(payload.body);

    var messageElement = document.createElement('li');

    if(message.type === 'JOIN') {
        messageElement.classList.add('event-message');
        message.content = message.sender + ' joined!';
    } else if (message.type === 'LEAVE') {
        messageElement.classList.add('event-message');
        message.content = message.sender + ' left!';
    } else {
        messageElement.classList.add('chat-message');

        var avatarElement = document.createElement('i');
        var avatarText = document.createTextNode(message.sender[0]);
        avatarElement.appendChild(avatarText);
        avatarElement.style['background-color'] = getAvatarColor(message.sender);

        messageElement.appendChild(avatarElement);

        var usernameElement = document.createElement('span');
        var usernameText = document.createTextNode(message.sender);
        usernameElement.appendChild(usernameText);
        messageElement.appendChild(usernameElement);
    }

    var textElement = document.createElement('p');
    var messageText = document.createTextNode(message.content);
    textElement.appendChild(messageText);

    messageElement.appendChild(textElement);

    messageArea.appendChild(messageElement);
    messageArea.scrollTop = messageArea.scrollHeight;
}


function getAvatarColor(messageSender) {
    var hash = 0;
    for (var i = 0; i < messageSender.length; i++) {
        hash = 31 * hash + messageSender.charCodeAt(i);
    }
    var index = Math.abs(hash % colors.length);
    return colors[index];
}

usernameForm.addEventListener('submit', connect, true)
messageForm.addEventListener('submit', sendMessage, true)
Explanation of main.js
Explanation of connect(event) function.
It is used to connecting with the /ws endpoint with the help of SockJS and STOMP. If you remembered we already define the method named registerStompEndpoints() in the class WebSocketConfig.java, which is responsible for established a WebSocket Connection between server and client.
onConnected() function
Once the connection established between the server and client then the client subscribes to the /topic/public destination, and finally, it informs the username to the server by calling or sending the message to /app/chat.addUser endpoint.
If you noticed subscribe function “stompClient.subscribe(‘/topic/public’, onMessageReceived)” call the another function named onMessageReceived(), whenever the new message received to the WebSocket Server.
The following are the scenario when the WebSocket Server will receive the new messages.
- New user join the chat.
- Someone send the message to anyone in chat box.
- User left the chat.
Apart from the above-explained code, the rest codes are just used for proper formatting or displaying the messages on the screen.
3. Adding the main.css in the path src/main/resources/static/css
main.css
* {
    -webkit-box-sizing: border-box;
    -moz-box-sizing: border-box;
    box-sizing: border-box;
}

html,body {
    height: 100%;
    overflow: hidden;
}

body {
    margin: 0;
    padding: 0;
    font-weight: 400;
    font-family: "Helvetica Neue", Helvetica, Arial, sans-serif;
    font-size: 1rem;
    line-height: 1.58;
    color: #333;
    background-color: #f4f4f4;
    height: 100%;
}

body:before {
    height: 50%;
    width: 100%;
    position: absolute;
    top: 0;
    left: 0;
    background: #1ebea5;
    content: "";
    z-index: 0;
}

.clearfix:after {
    display: block;
    content: "";
    clear: both;
}

.hidden {
    display: none;
}

.form-control {
    width: 100%;
    min-height: 38px;
    font-size: 15px;
    border: 1px solid #c8c8c8;
}

.form-group {
    margin-bottom: 15px;
}

input {
    padding-left: 10px;
    outline: none;
}

h1, h2, h3, h4, h5, h6 {
    margin-top: 20px;
    margin-bottom: 20px;
}

h1 {
    font-size: 1.7em;
}

a {
    color: #128ff2;
}

button {
    box-shadow: none;
    border: 1px solid transparent;
    font-size: 14px;
    outline: none;
    line-height: 100%;
    white-space: nowrap;
    vertical-align: middle;
    padding: 0.6rem 1rem;
    border-radius: 2px;
    transition: all 0.2s ease-in-out;
    cursor: pointer;
    min-height: 38px;
}

button.default {
    background-color: #e8e8e8;
    color: #333;
    box-shadow: 0 2px 2px 0 rgba(0, 0, 0, 0.12);
}

button.primary {
    background-color: #1ebea5;
    box-shadow: 0 2px 2px 0 rgba(0, 0, 0, 0.12);
    color: #fff;
}

button.accent {
    background-color: #ff4743;
    box-shadow: 0 2px 2px 0 rgba(0, 0, 0, 0.12);
    color: #fff;
}

#username-page {
    text-align: center;
}

.username-page-container {
    background: #fff;
    box-shadow: 0 1px 11px rgba(0, 0, 0, 0.27);
    border-radius: 2px;
    width: 100%;
    max-width: 500px;
    display: inline-block;
    margin-top: 42px;
    vertical-align: middle;
    position: relative;
    padding: 35px 55px 35px;
    min-height: 250px;
    position: absolute;
    top: 50%;
    left: 0;
    right: 0;
    margin: 0 auto;
    margin-top: -160px;
}

.username-page-container .username-submit {
    margin-top: 10px;
}


#chat-page {
    position: relative;
    height: 100%;
}

.chat-container {
    max-width: 700px;
    margin-left: auto;
    margin-right: auto;
    background-color: #fff;
    box-shadow: 0 1px 11px rgba(0, 0, 0, 0.27);
    margin-top: 30px;
    height: calc(100% - 60px);
    max-height: 600px;
    position: relative;
}

#chat-page ul {
    list-style-type: none;
    background-color: #FFF;
    margin: 0;
    overflow: auto;
    overflow-y: scroll;
    padding: 0 20px 0px 20px;
    height: calc(100% - 150px);
}

#chat-page #messageForm {
    padding: 20px;
}

#chat-page ul li {
    line-height: 1.5rem;
    padding: 10px 20px;
    margin: 0;
    border-bottom: 1px solid #f4f4f4;
}

#chat-page ul li p {
    margin: 0;
}

#chat-page .event-message {
    width: 100%;
    text-align: center;
    clear: both;
}

#chat-page .event-message p {
    color: #777;
    font-size: 14px;
    word-wrap: break-word;
}

#chat-page .chat-message {
    padding-left: 68px;
    position: relative;
}

#chat-page .chat-message i {
    position: absolute;
    width: 42px;
    height: 42px;
    overflow: hidden;
    left: 10px;
    display: inline-block;
    vertical-align: middle;
    font-size: 18px;
    line-height: 42px;
    color: #fff;
    text-align: center;
    border-radius: 50%;
    font-style: normal;
    text-transform: uppercase;
}

#chat-page .chat-message span {
    color: #333;
    font-weight: 600;
}

#chat-page .chat-message p {
    color: #43464b;
}

#messageForm .input-group input {
    float: left;
    width: calc(100% - 85px);
}

#messageForm .input-group button {
    float: left;
    width: 80px;
    height: 38px;
    margin-left: 5px;
}

.chat-header {
    text-align: center;
    padding: 15px;
    border-bottom: 1px solid #ececec;
}

.chat-header h2 {
    margin: 0;
    font-weight: 500;
}

.connecting {
    padding-top: 5px;
    text-align: center;
    color: #777;
    position: absolute;
    top: 65px;
    width: 100%;
}


@media screen and (max-width: 730px) {

    .chat-container {
        margin-left: 10px;
        margin-right: 10px;
        margin-top: 10px;
    }
}

@media screen and (max-width: 480px) {
    .chat-container {
        height: calc(100% - 30px);
    }

    .username-page-container {
        width: auto;
        margin-left: 15px;
        margin-right: 15px;
        padding: 25px;
    }

    #chat-page ul {
        height: calc(100% - 120px);
    }

    #messageForm .input-group button {
        width: 65px;
    }

    #messageForm .input-group input {
        width: calc(100% - 70px);
    }

    .chat-header {
        padding: 10px;
    }

    .connecting {
        top: 60px;
    }

    .chat-header h2 {
        font-size: 1.1em;
    }
}
Above code is just used for designing our application.
Step 10: Run the application
Go to the localhost:8080, you will get the screen as shown below.
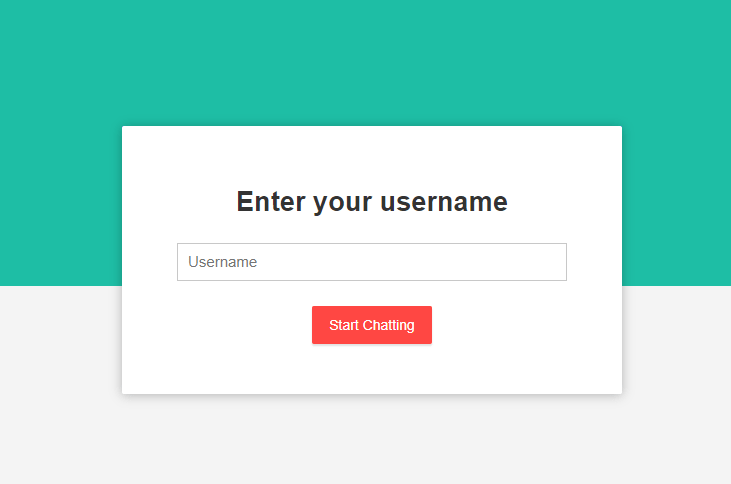
Once you enter your username and click on the start chatting button, you will be redirected to the chatbox.
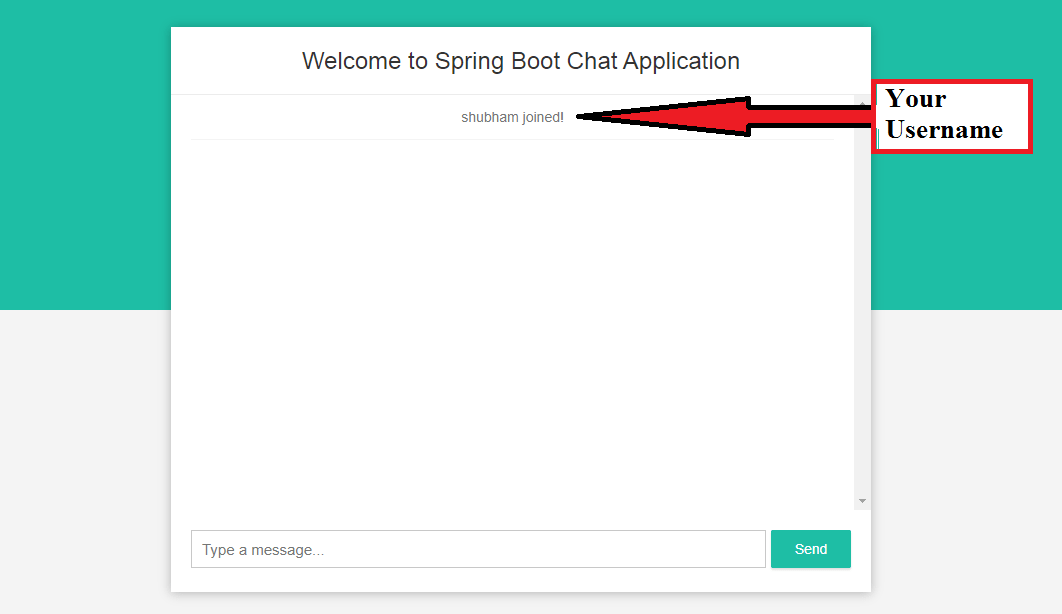
Type some random message.
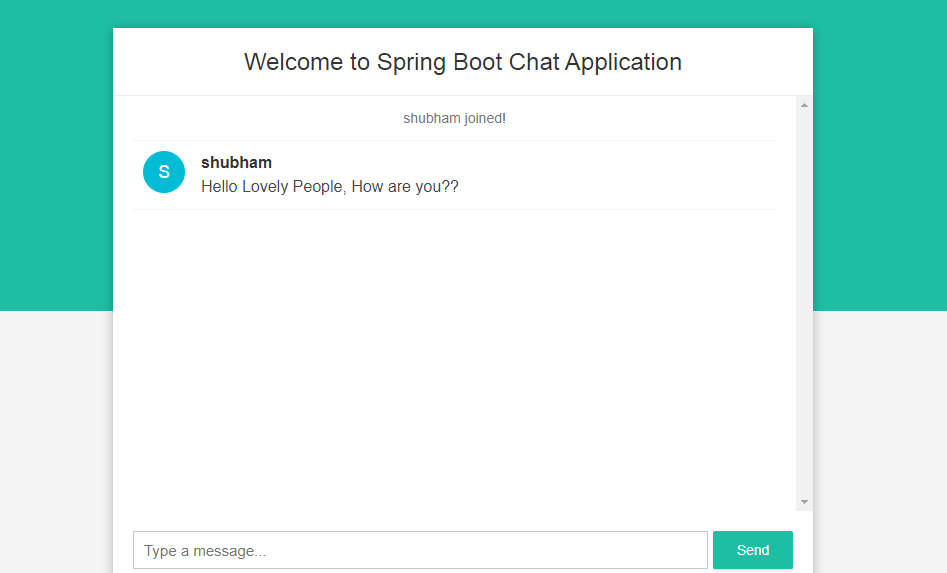
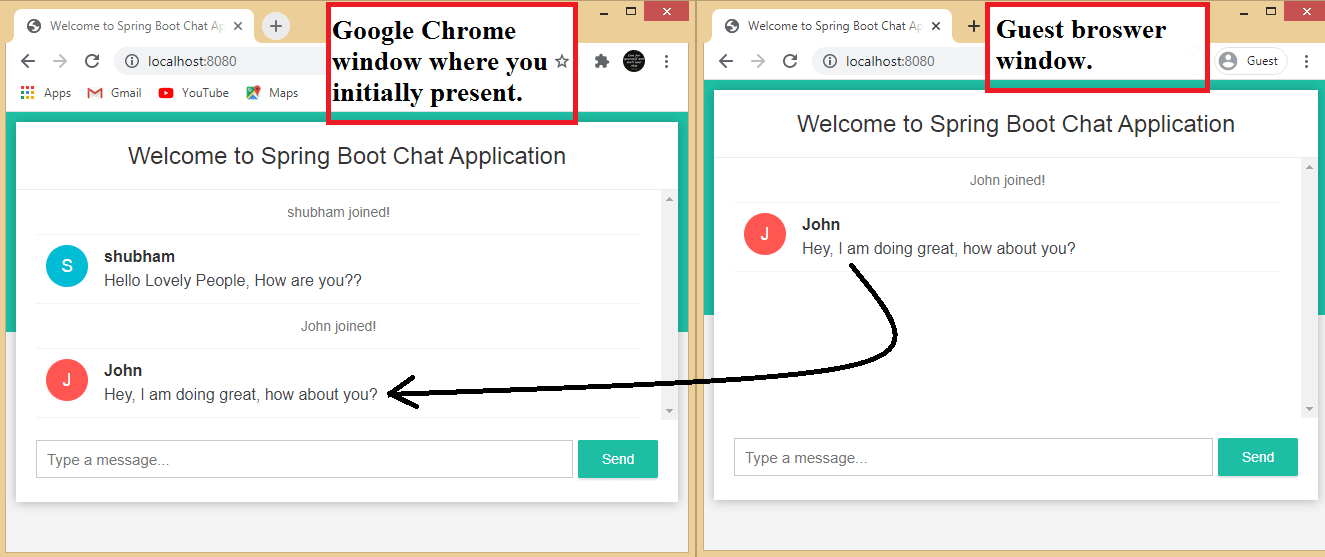
Go to the incognito mode or guest mode on your browser and visit localhost:8080, you will again be asked to enter a username, give some other name and click on start chatting, now type some message, and send it in that chat.
Now visit your home browser were you already there with your original name, therein chatbox you can the message received which you send from the Guest mode.
Summay
In this article, we learn to build a chat application, where many people can communicate with each other and send messages. If you have any queries or getting an error please let me know in the comment section. I will surely help you.
You might also like this article.
- Payment Integration With Paytm in Spring Boot Application
- Send OTP(One Time Password) Using Spring Boot Application for Authentication
- Make a Voice Call from Spring Boot Application to Mobile Phone
- How to send email using Spring Boot Application
- Spring Boot Security using OAuth2 with JWT
- Build Spring Boot Restful CRUD API with Hibernate and Postgresql from scratch